If you want to host a live stream then YouTube must be a perfect option for you. Because on YouTube you can control the visibility of your live stream. But how can you do that? If you don’t know the way to do that, then this blog will be helpful for you. Because in this blog you are going to see how to host a private live stream on YouTube in three steps.
But before that to host here live stream on YouTube you must have an active and verified Youtube account. So before starting this process make sure you must have a YouTube account or create a new one and verify it.
How to host a private live stream on YouTube
Creating and hosting a live stream publicly on YouTube is very easy but controlling the visibility of your live stream is quite difficult on YouTube. So if you want to host a private live stream on YouTube then follow the below-mentioned steps.
- Go to youtube and click on go-live
- Select right now, choose built-in webcam
- Enter necessary details and click on the visibility
- Select private and invite others by email option
Step 1: Go to YouTube and click on go-live
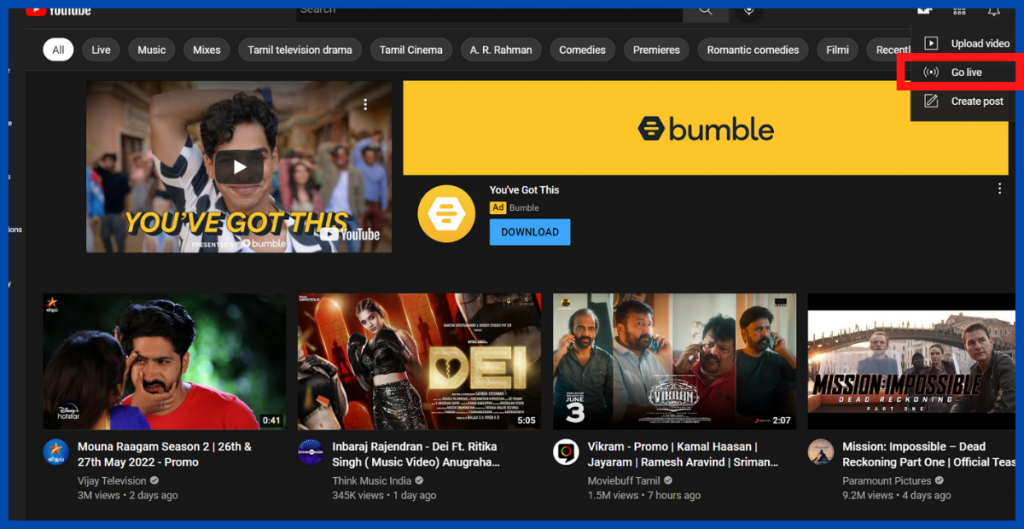
- First, you have to go to youtube.com or open YouTube app on your mobile(the processes same for both)
- Then click on create and select go live you can also do this from YouTube studio
- To host a YouTube live stream you must have a verified YouTube account. To verify your YouTube account with your mobile number before starting this
Step 2: select right now, choose built-in webcam
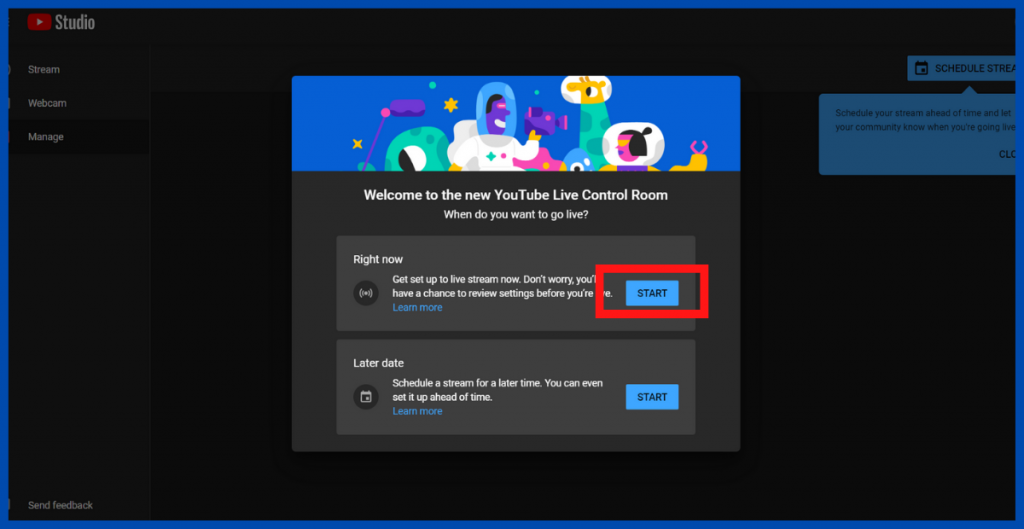
- After selecting the go-live option you will be redirected to the YouTube live control room
- You will see two options the first one is right now and the second one is a later date
- By selecting a right now option you can start a live stream instantly. If you want to schedule a stream for later then choose the later date option
- For this tutorial, I am selecting the right now an option in this you will get a chance to review your settings before you go live
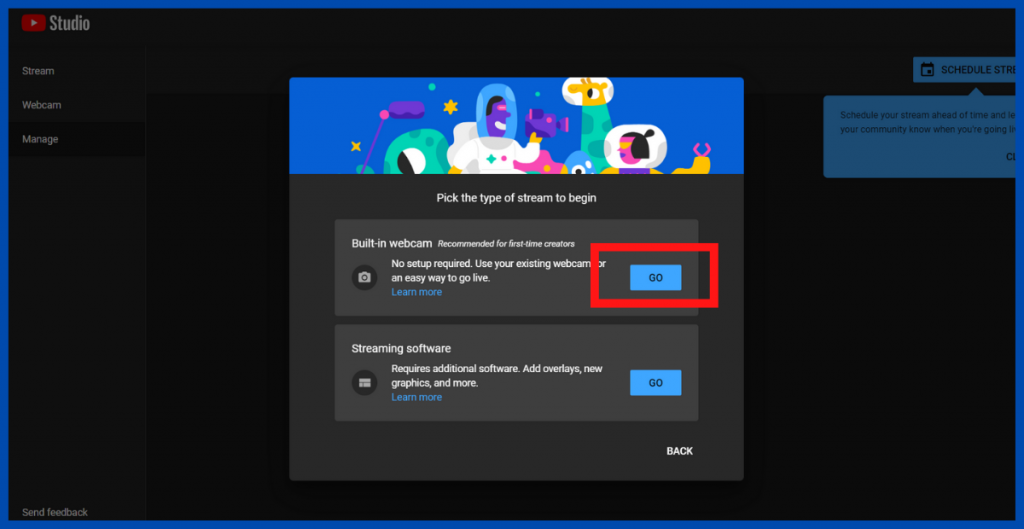
- After selecting right now again you will see two options one is a built-in webcam and another one is streaming software
- So if you want to go to live without any overlays for graphics just select a built-in webcam option. But if you want to add overlays or graphics text to your live stream then click streaming software but you need streaming software to do this
- Here, I am continuing with the built-in webcam so just click on go inbuilt webcam option
- After clicking that YouTube as your permission to access the camera and microphone, without giving this access you can’t host a live stream on YouTube
Step 3: Enter necessary details and click on the visibility
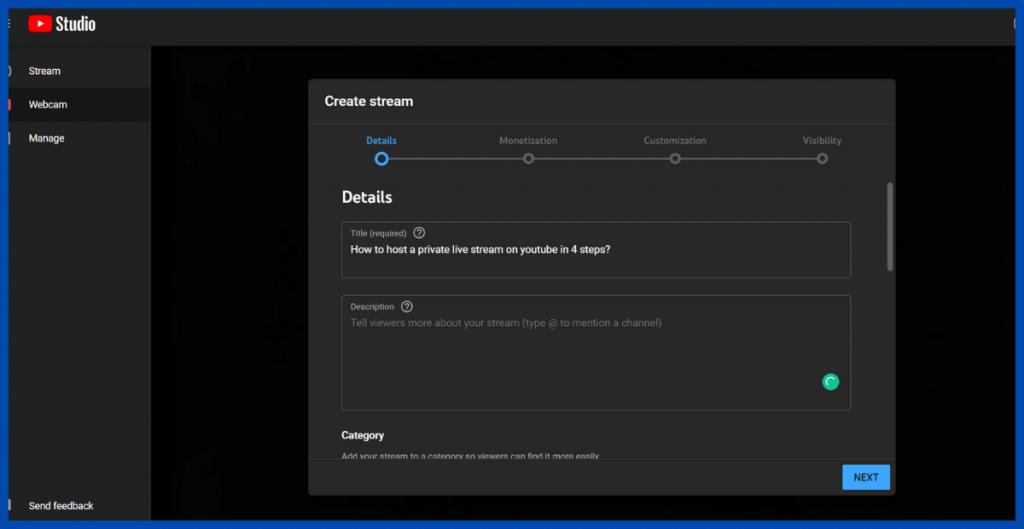
- After giving the camera and the microphone access you can see the option to create a stream on YouTube
- So just enter the title and description and other required details in the first section
- After entering the details you will see the customization option. With this, you can edit live chat, participant modes, message delay redirect, and trailer options
- After doing the necessary customization option you can click the visibility
Step 4: Select private and invite others
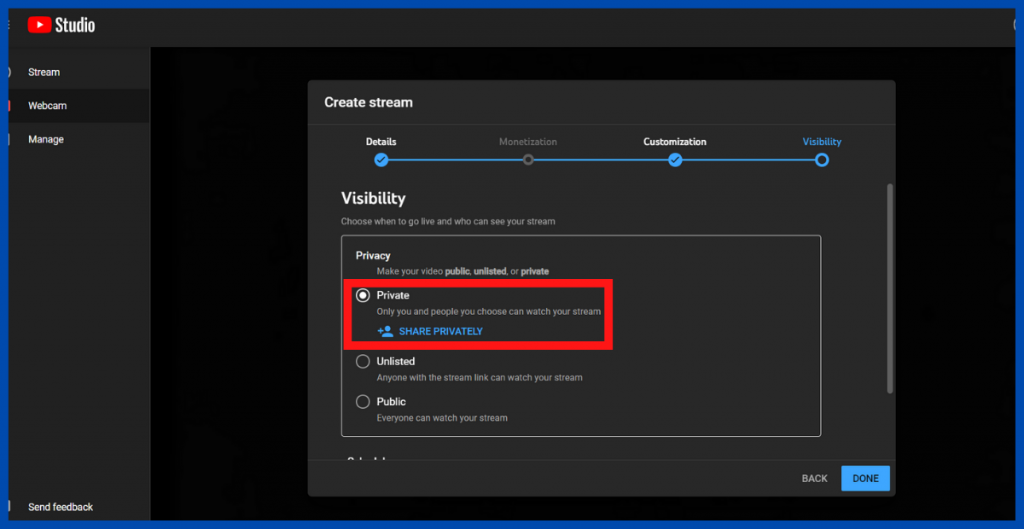
- That you will find three visibility options they are private, unlisted, and public
- If you want to host a private live stream then select private. By selecting this you have to invite users by adding their e-mail IDs
- If you don’t want to invite yourself but want to create a private live stream then click on the unlisted option. Did this option anyone with the live streaming can watch the live stream?
- If you want to do a public live stream then click on public so everyone can watch your stream
- So to host your private live stream click on private then you can see the option to share the live stream privately
- After clicking that you will see one box where you can enter the email IDs of invitees so they can get an invite
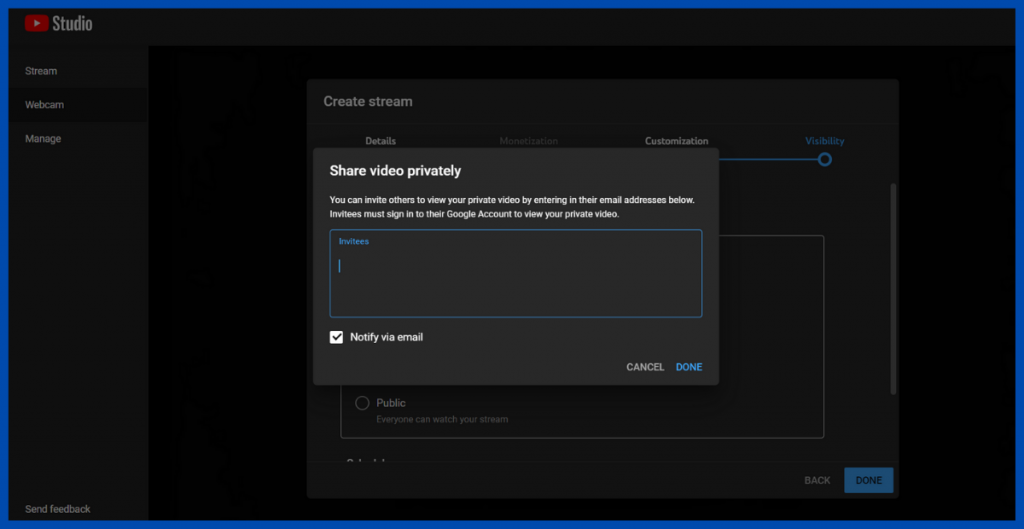
- If you want to notify them via email then check the notification via email box and click on done
- After clicking on done you will see the option to preview your stream just check it. If you want to edit details then click on edit and make the necessary changes
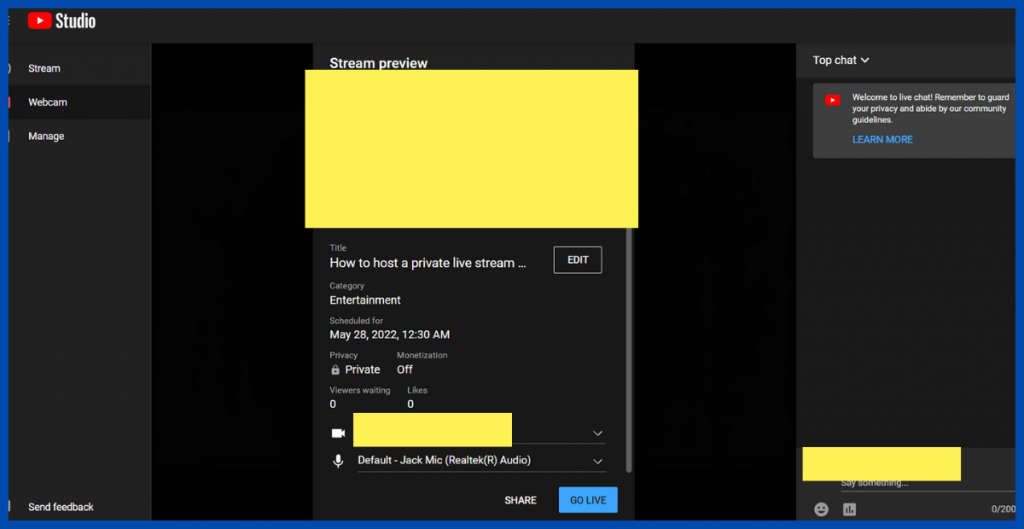
- Now you are ready to go like just click on go-live to start your live stream. You will also see the option to share a live stream from that page
- So if you want to share this live stream link to others or share this link via given social media use this sharing feature. But this won’t work on private live streams this will be only useful for unlisted and public live streams
Conclusion
In this blog, we have seen how to Austria private live stream on YouTube in 4 steps. So if you want to host a live stream to share your updates with your friends or followers via YouTube then follow the above mention steps. If you like this blog share this with your friends and follow Publish Square for more blogs like this


